How To Setup Siteground's Let's Encrypt SSL In 6 Minutes
First, why should you move your site from http to https? Well, according to KeyCDN's excellent article, there are five key reasons and I would encourage you to take the time to read it:
- Performance
- SEO and Rankings
- Better Referral Data
- More Secure
- Build Trust and Credibility
Those are some heavy hitters there.
So let's setup Siteground's Let's Encrypt SSL!
SIX MINUTES
Lets go!
Video Tutorial
If you prefer not to watch the video or need more instructions, then continue reading.
1. Setup Siteground's Let's Encrypt SSL
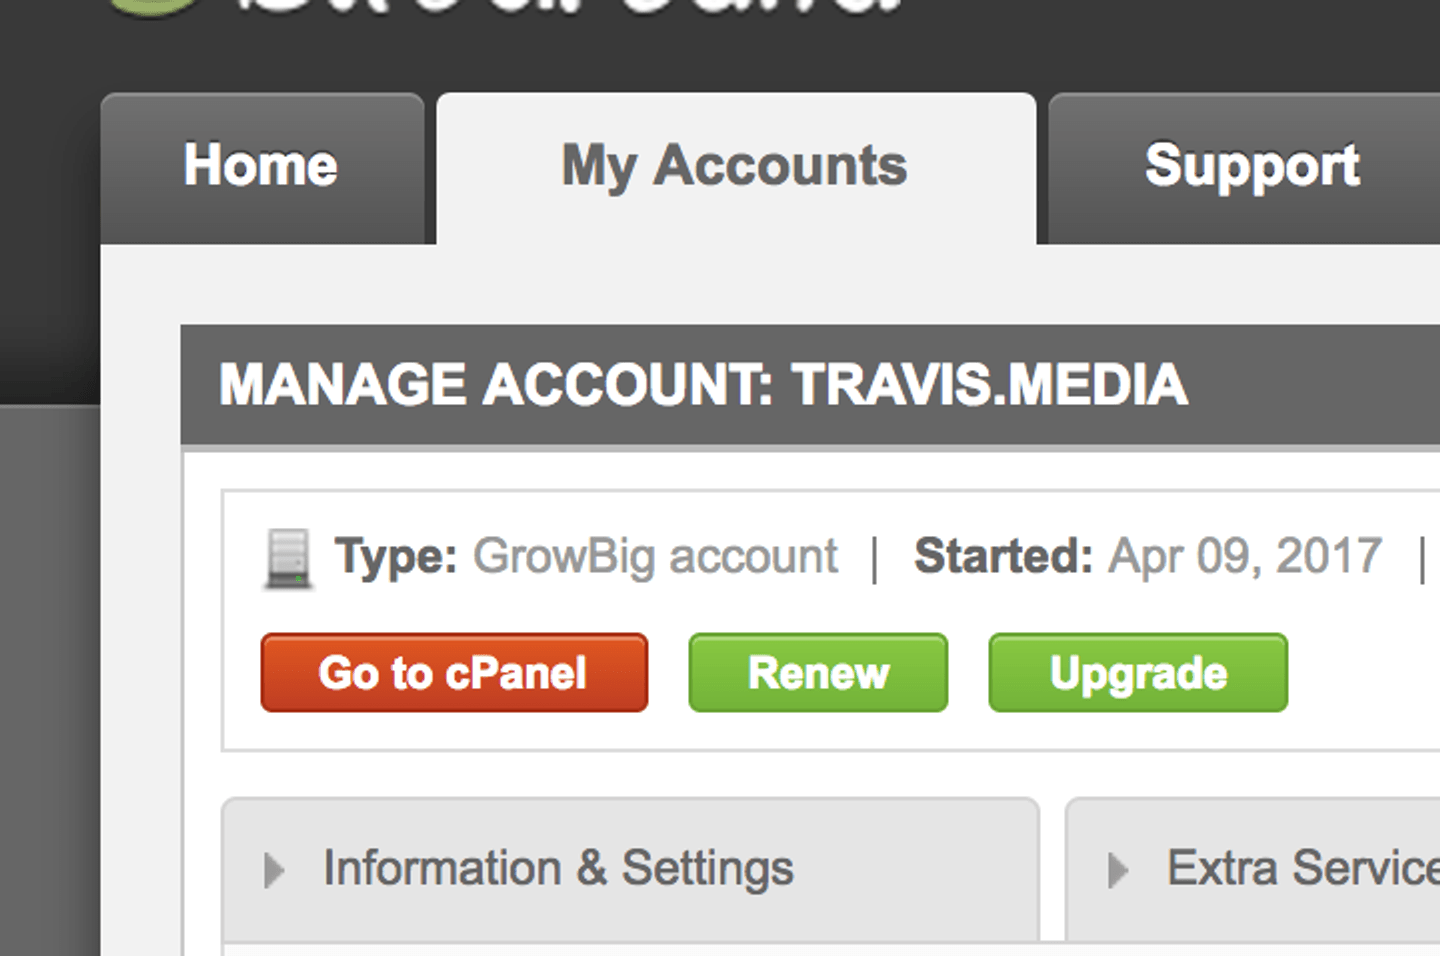
Log into Siteground, go to the My Account tab, and select the Go To cPanel button:
No scroll down to the section labeled Security and click on Let's Encrypt:

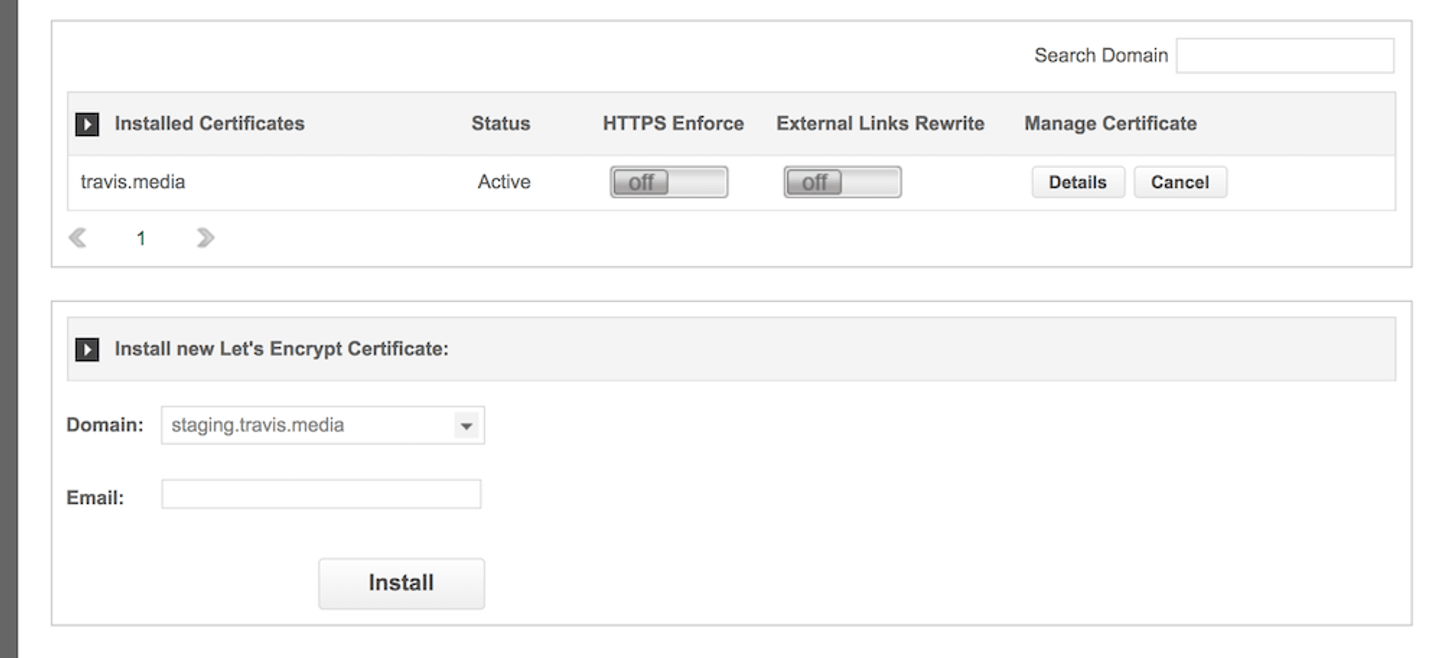
This will take you to the Let's Encrypt setup screen.
From here you need to select your domain at the bottom, enter your email address, and click install to install the SSL certificate.
Once this finishes, you will see your domain under the Installed Certificates section above it.
This means your site will accept HTTPS, but can go either way. In order to enforce the HTTPS we need to slide the HTTPS Enforce slider from off to on.
Now when you go back to your site and refresh you will see that it is now served by the HTTPS protocol. (It may require you to log back in.
YAY!
But wait
2. Mixed Content
What about all those images and links that were previously HTTP? We are forcing the URL to HTTPS, but what about these static files that are still HTTP.
Well, these will give you errors, either errors in your Console or even worse, your images may not show up!
This happens because unsecure HTTP files are being loaded over a secure environment.
But no worries, its an easy fix.
3. Better Search Replace
What we need to do now is sift through our database, which houses our posts and more, and change those HTTP links, etc. to HTTPS.
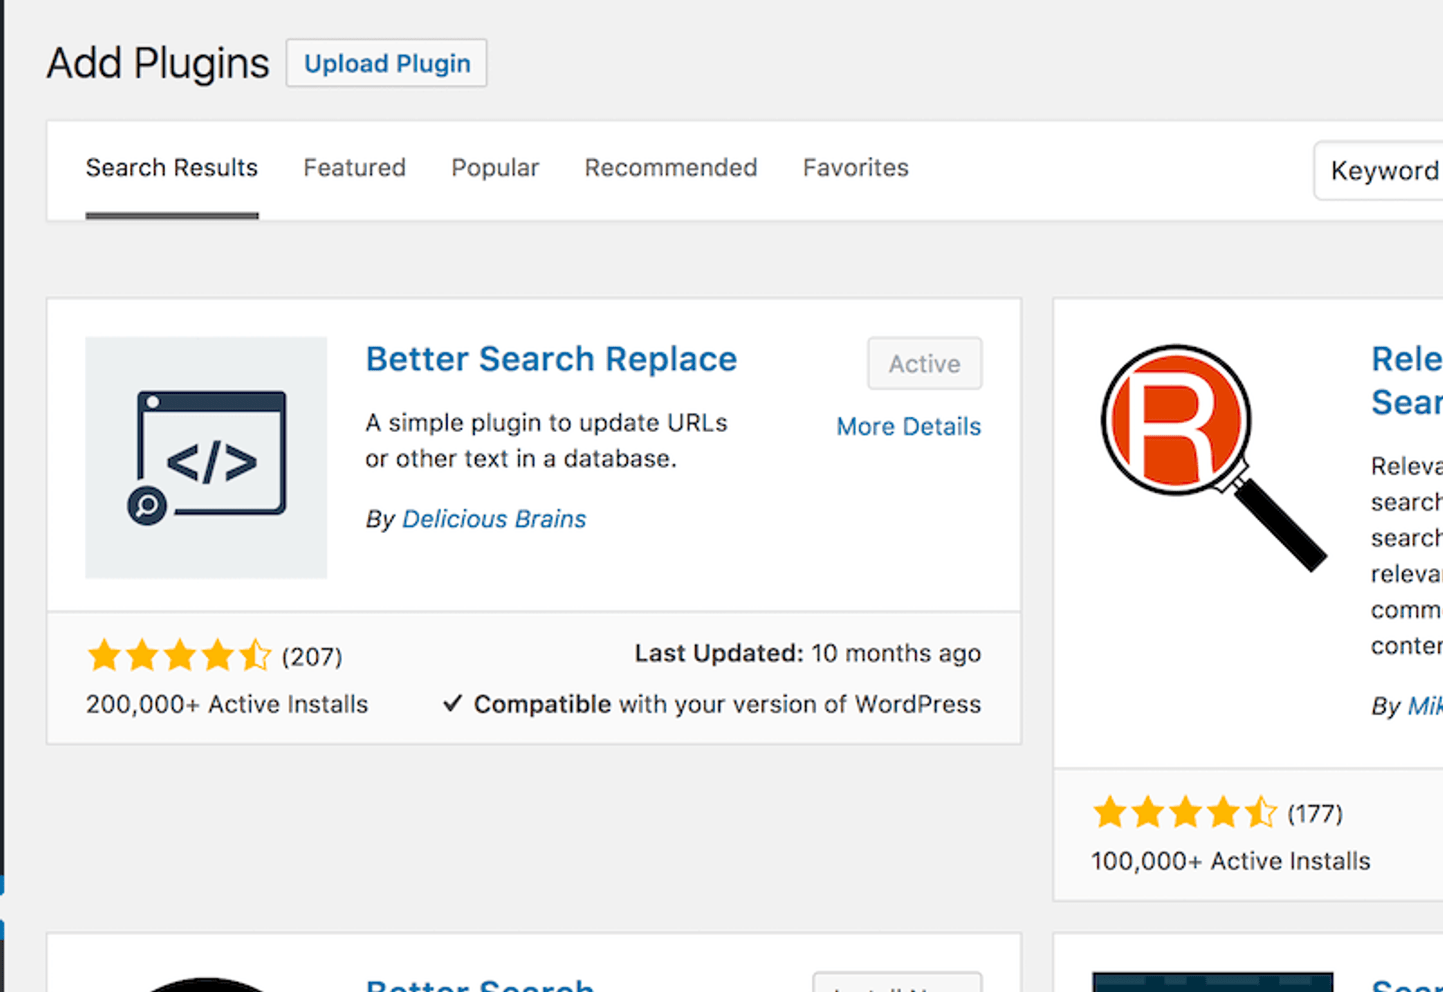
So go to your Plugins menu, and Add New. Do a search for a plugin named Better Search Replace:
Install this plugin and activate it.
Now go to Tools –> Better Search Replace and you will come to this screen:
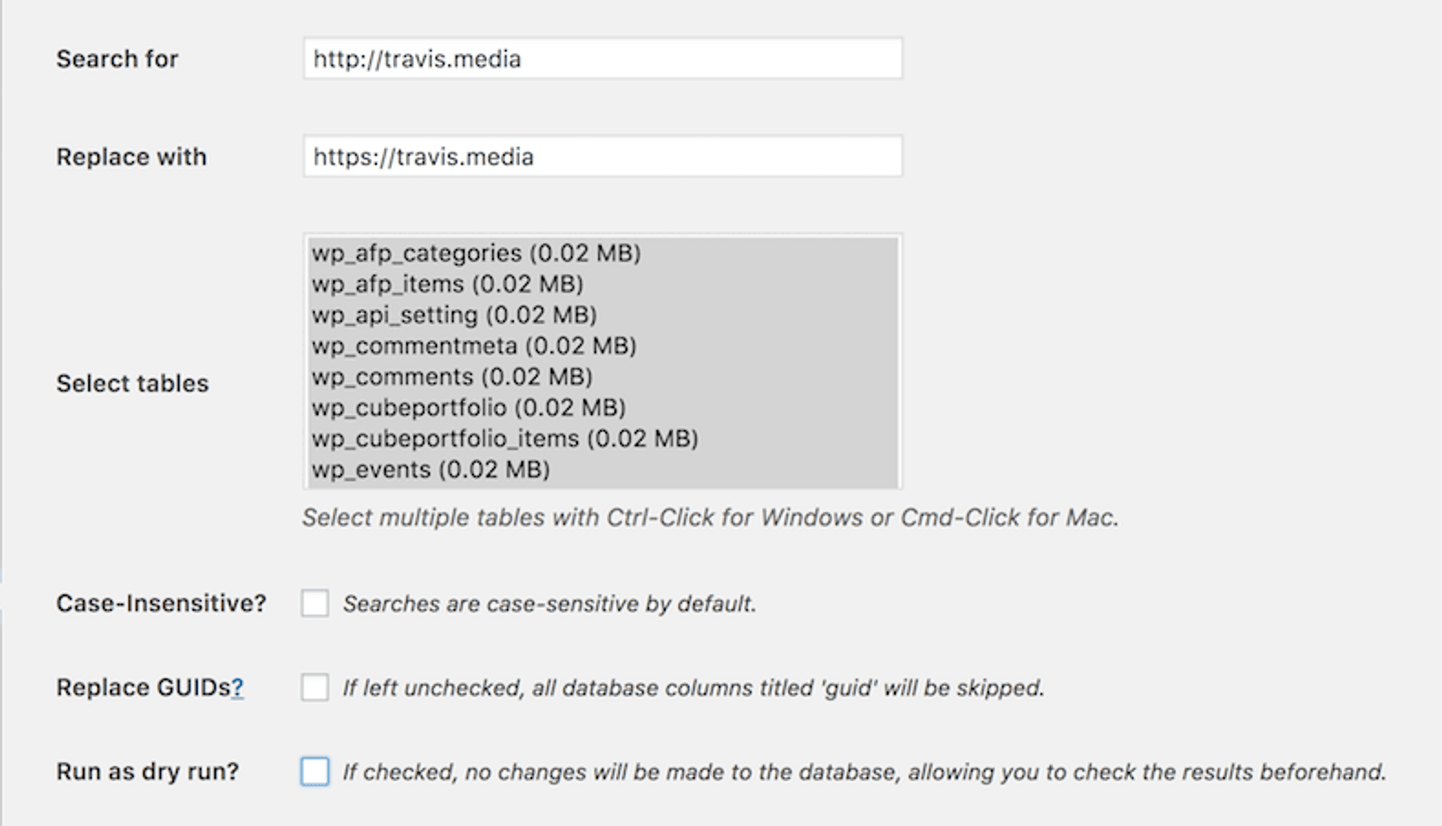
You want to select all the tables and Search for your URL with the HTTP (http://example.com) and Replace with the HTTPS URL (https://example.com).
Be sure to use your URL!! My URL is used in the photo for an example.
Try a Dry Run first if you like or not, but deselect it to actually make it happen.
AND THATS IT!
Yay again!
Now your site should look the same. You should see no errors in the Console stating HTTP files are being served over an HTTPS site.
If you are like, "What is the console?" then you can try a different method, which is to use a HTTPS validator site such as SSL Shopper.
In addition, you will want to add a new property in Google Search Console for your HTTPS property.
And thats it! That is how to setup Siteground's Let's Encrypt in less than 6 minutes……well at least the video was that long!!
In all seriousness, I hope this helped and let me know of any questions or concerns.
----------
** This article may contain affiliate links. Please read the affiliate disclaimer for more details.

Travis of
Travis Media


You May Also Like
Cloudways Review and Tutorial: Managed Wordpress Hosting In the Cloud

How to Find a GoDaddy Nameserver IP Address For Any Host