· Travis Rodgers · Programming · 4 min read
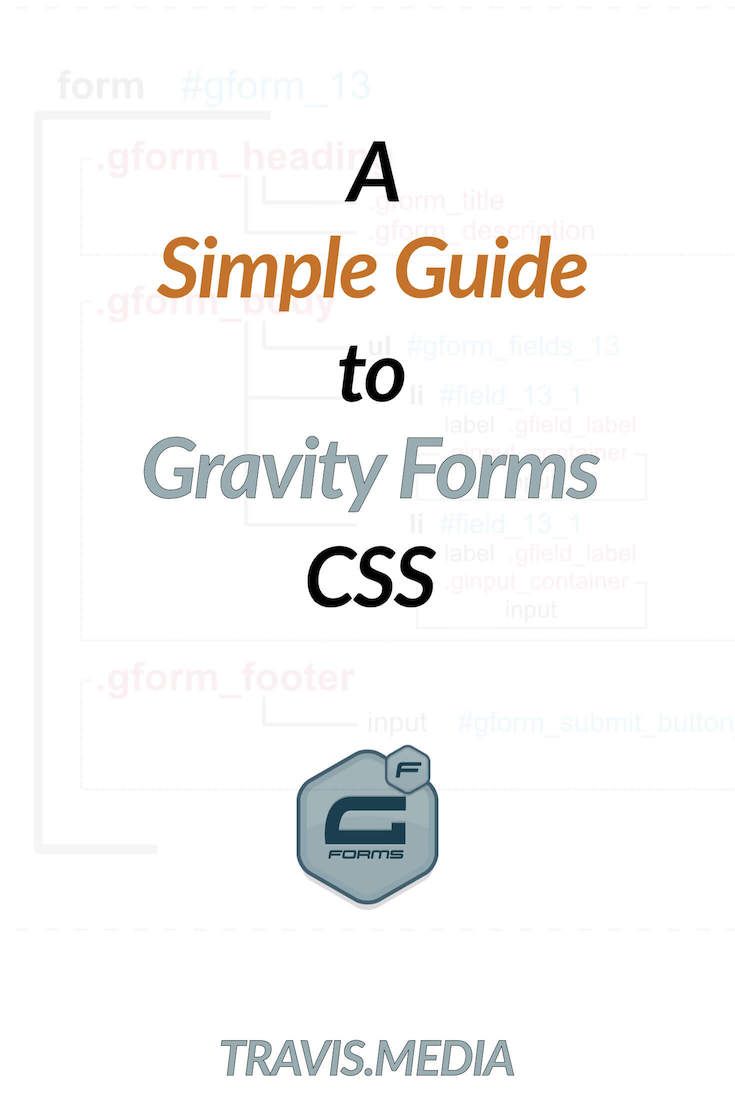
A Simple Guide To Gravity Forms CSS
Gravity Forms is hands down the best tool for WordPress forms. Styling them, however, can be tricky. In this post, I will provide a helpful guide to Gravity Forms CSS, giving you 4 simple concepts to ensure success in styling any form.
Many of us have experienced the frustration of trying to style Gravity Forms. On the surface, it is far from the easiest of tasks. However, there are really only a few concepts you need to understand to successfully style Gravity Forms CSS with ease.
And to be specific, I have come up with 4 core concepts that you need to know.
Let's take a look.
4 Concepts to Understand for Gravity Forms CSS
A Video Demonstration – **be sure to subscribe to the channel.
If you'd rather read the post, then continue on for all the details:
1. Know your Form ID
Gravity Forms uses basically the same layout and structure with every form.
The only real changing factor is the form number. This is the very first thing you want to obtain when styling any form…its number.
If you pull up your list of forms, this number is found in the ID column. It is the ID that identifies your form.

The ID for this form is 14.
2. Know the Gravity Forms Layout
Understanding the layout of the Gravity Forms Form is key and actually very simple once you see it.
For my example I will create a basic form called 'Testing' that has an ID of 13. It looks like this:

Remember, the most important aspect of styling this form is knowing its ID, which in my example is 13.
So let's take a look under the hood of the above form, at this detailed diagram I created below of a form with the ID of 13:
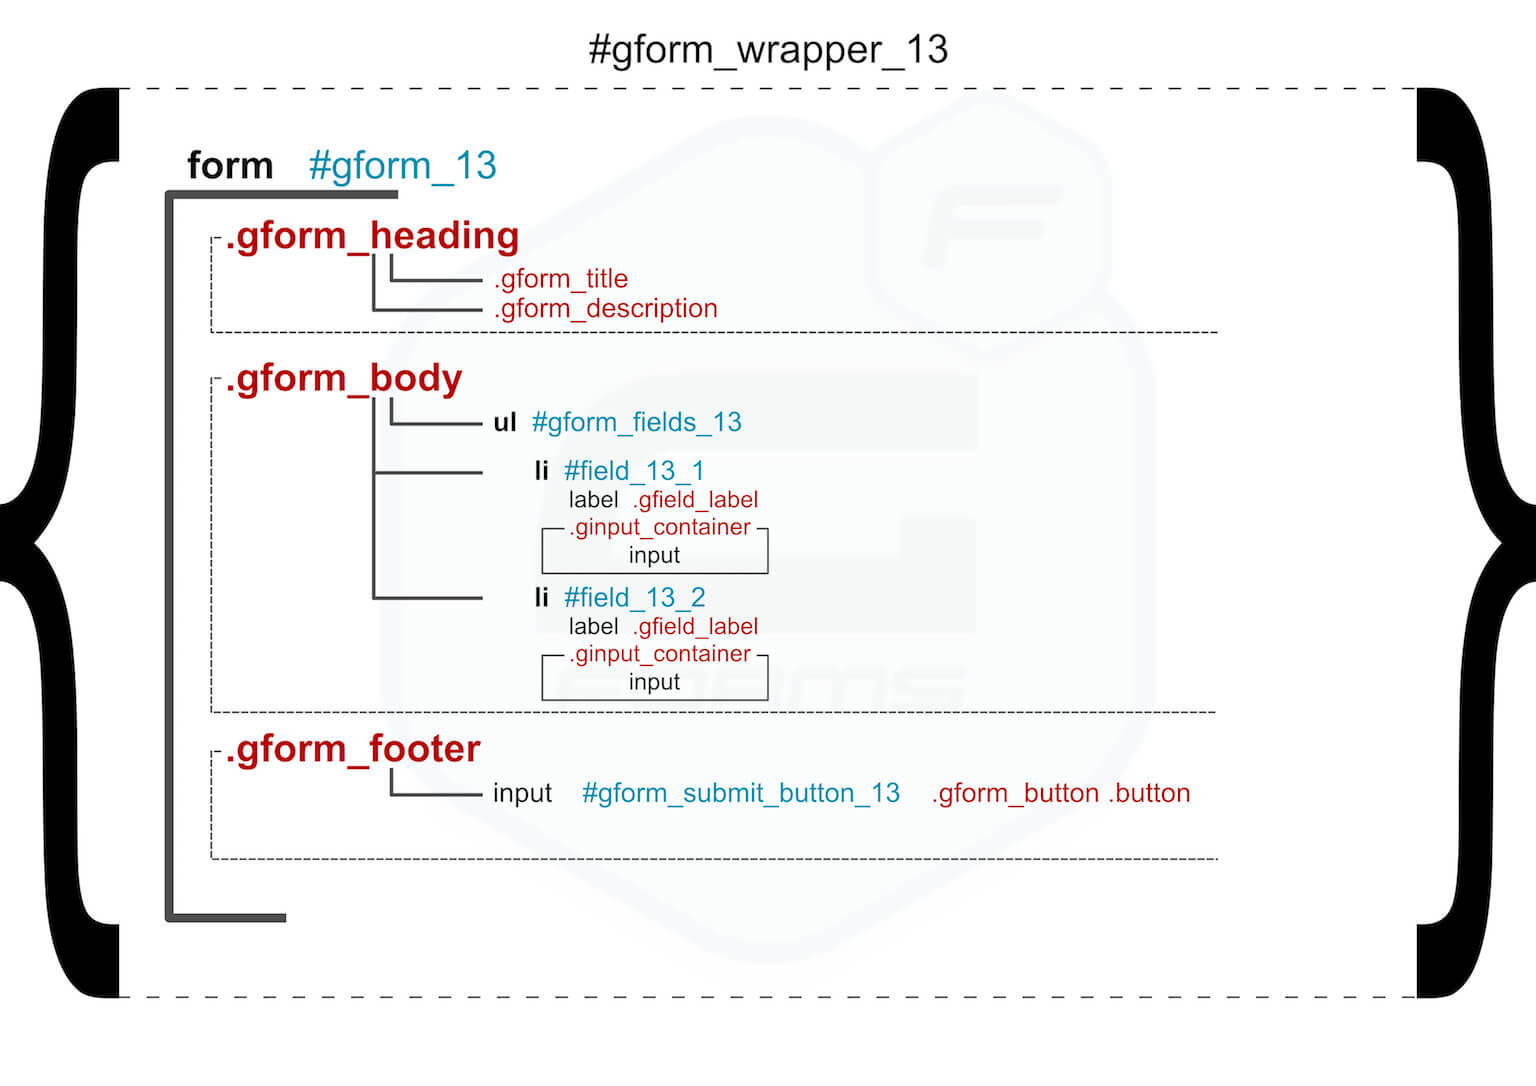
Here are a few things to note:
- There is a wrapper wrapping the entire form with the ID of gform_wrapper_13
- There is a form element with an ID of gform_13
- There are three sections with class names: gform_heading, gform_body, and gform_footer.
- Heading includes the form title and description.
- Body includes list items wrapped in an unordered list tag with an ID of gform_fields_13. The list items are fields with, again, IDs related to the form ID. There are labels, and then there are classes of .ginput_container containing inputs.
- Footer includes most importantly, the submit button.
In a nutshell that is it. (Yes, the body section can get more complex as you add more complex fields, but I have provided a solid starting point from which to build on).
Download the chart above, and use it for reference.
3. Be Specific
What do I mean by this?
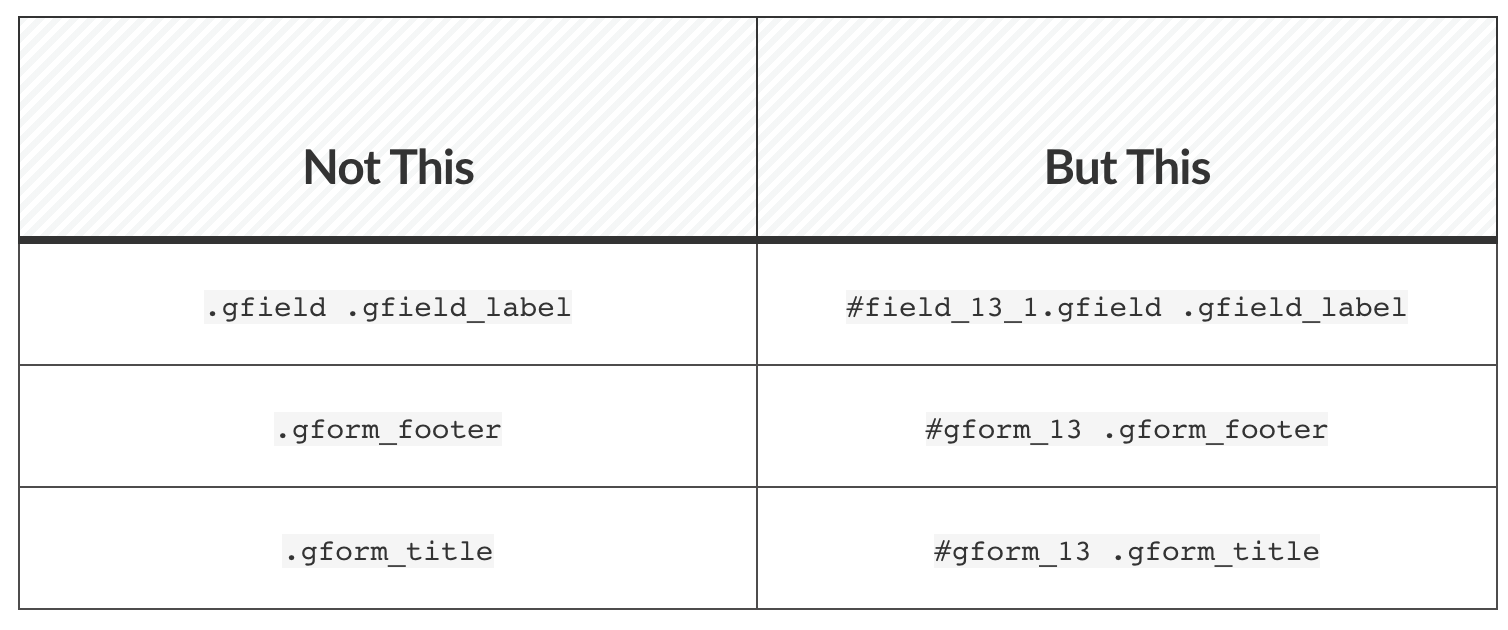
I simply mean, if you wish only this form to receive a particular style, be sure to include IDs and Classes that include your ID number.
So if you are adding a style to your .gform_body class, and you don't want all your other forms to have that style, add the form ID before it like so:
#gform_13 .gform_body
Other examples of being specific may include:
4. Looking Out For Inline Classes
You may have questioned this example above:
#field_13_1.gfield .gfield_label
This is a CSS rule that I learned later in my coding journey and it goes like this:
If you are targeting two elements in the same line of code, there cannot be a space in between them.
So the .field_13_1 class and the .gfield class as referenced above cannot have any spaces between them because they are on the same line of code:

And of course the .gfield_label class has a space because it is on the next line.
Just remember this concept as you start to target specific elements. It's important.
Conclusion
In my experience, these four Gravity Forms CSS concepts have allowed me a much easier time when styling these forms, and trust me…..they NEED to be styled.
Let me know if you have any questions.
Have you found it hard to style Gravity Forms forms? What has made it easier for you?
Related Post — How to create a custom checkbox in Gravity Forms