- Why I Recommend Cloudways for Managed WordPress Hosting
- What is Cloudways?
- Why use Cloudways?
- Cloudways Setup Tutorial and Features
- Create Account and Install WordPress
- Transferring your site?
- Server Management
- Application Management
- Check your WordPress site
- The Benefits of Cloudways?
- Go Sign Up (Free Migration)
Why I Recommend Cloudways for Managed WordPress Hosting
I moved away from WordPress as a CMS a couple of years ago. I just didn’t need all the features that it provides on my blog anymore.
However, I still think it’s the absolute best place to for everyone to start blogging or creating content of any kind. In fact, there are huge sites out there (WPBeginner!) that use it. So not only can you start with it, but you can grow it as large as you’d like.
Many of my readers use it and I’ve provided many tutorials and posts on WordPress development as I used to be a WordPress developer.
But I’ve changed my mind numerous times in the past on where I think is the best place to host a WordPress site.
At the beginning, I recommended popular companies like Bluehost and Siteground. These are great companies, but as your site grows and you need more hand-holding, they can sometimes leave you stranded.
As my site grew, I ended up moving to Flywheel, which is a managed WordPress solution and loved it. In fact, my PageSpeed jumped dramatically by just moving to a better quality host. However, there were limitations with Flywheel that emerged eventually (more on that below).
Still, I have to give a good recommendation as to where my readers should host their blogs.
Since Flywheel, I’ve spent more time in the Cloud and am convinced that wherever you host your WordPress website it should be:
- Managed and
- In the cloud (reaping cloud benefits like elasticity and durability).
After some research, I arrived at a hosting company called Cloudways and this is where I would host my WordPress website if I used the platform again.
And it’s where I recommend my readers, who are looking for managed hosting, to host their WordPress website.
What is Cloudways?
Cloudways is a very affordable, managed, cloud hosting platform for PHP sites (including WordPress). Let’s look a few of these terms:
Affordable: WPEngine starts at $25/month ($30 if you don’t pay annually). Flywheel starts at $15/month. Cloudways starts at only $10/month. And thats for managed hosting! And you can cancel anytime.
Managed: Managed hosting means that the hosting company handles the administration and management of your servers. In the case of Cloudways, they have 24/7/365 Live Chat, will help you deploy or update your server/app in various ways, will inform you and start investigating if your server or stack is down, and overall take the complication that comes with using Cloud infrastructure off of your hands. In short, you’re not left on your own to manage your resources and can spend the bulk of your time focusing on what matters most, your website.
Cloud Hosting: Cloud hosting can be complicated to non-developers. AWS has hundreds of services, server sizes, etc. and it’s hard to manage or even know where to begin for many. The same follows with Digital Ocean or Linode (a bit easier than AWS, but not managed). What Cloudways does is they take the complication out of cloud hosting and allow you not only to pick your cloud provider choice, but provide you will the tools that do all the work for you. So you get the benefits of the cloud with the ease of having a sys-admin there looking out for you.
PHP Sites: While, yes, this includes technologies such as Laravel, I am mainly looking at WordPress hosting here.
Why Use Cloudways?
One issue I had in the past with managed wordpress hosting was that they usually control TOO much.
For instance, I really liked Flywheel for managed wordpress hosting, but there were things that they would NOT allow you to touch (like the wp-config.php file). If you wanted to flip debug mode on or define a global variable there, you had to contact them and get them to do it for you (their support was very good though).
Managed Hosting providers in general usually make config changes easy for you by giving you those options but within their own boundaries and interfaces. For example, instead of having to set up HTTP/S redirects in the .htaccess file I only need to toggle a switch. The downside is that often you are restricted from features without an alternative way to access them.
Not with Cloudways.
With Cloudways, I not only have managed hosting, but I’m free also to take the reins over more advanced features that I, as a developer, like to control (like my wp-config file!.
In addition, the features they offer are massive (in a good way). I’ll go over my favorite ones below as we work through the tutorial.
Cloudways Setup Tutorial and Features
So let’s set up a WordPress site on Cloudways.
Create Account and Install WordPress
Head over to the Cloudways website and click on the “Get Started Free” button. You get a free 3 day trial to try it out.
Next, deploy a WordPress site. Don’t worry about transferring a site yet (we’ll discuss that below), just create a new one for now.
Choose your WordPress version, name your app, server, and project, and choose a Cloud Provider. Prices will go from lower to higher as you move from Digital Ocean to Google Cloud Platform.
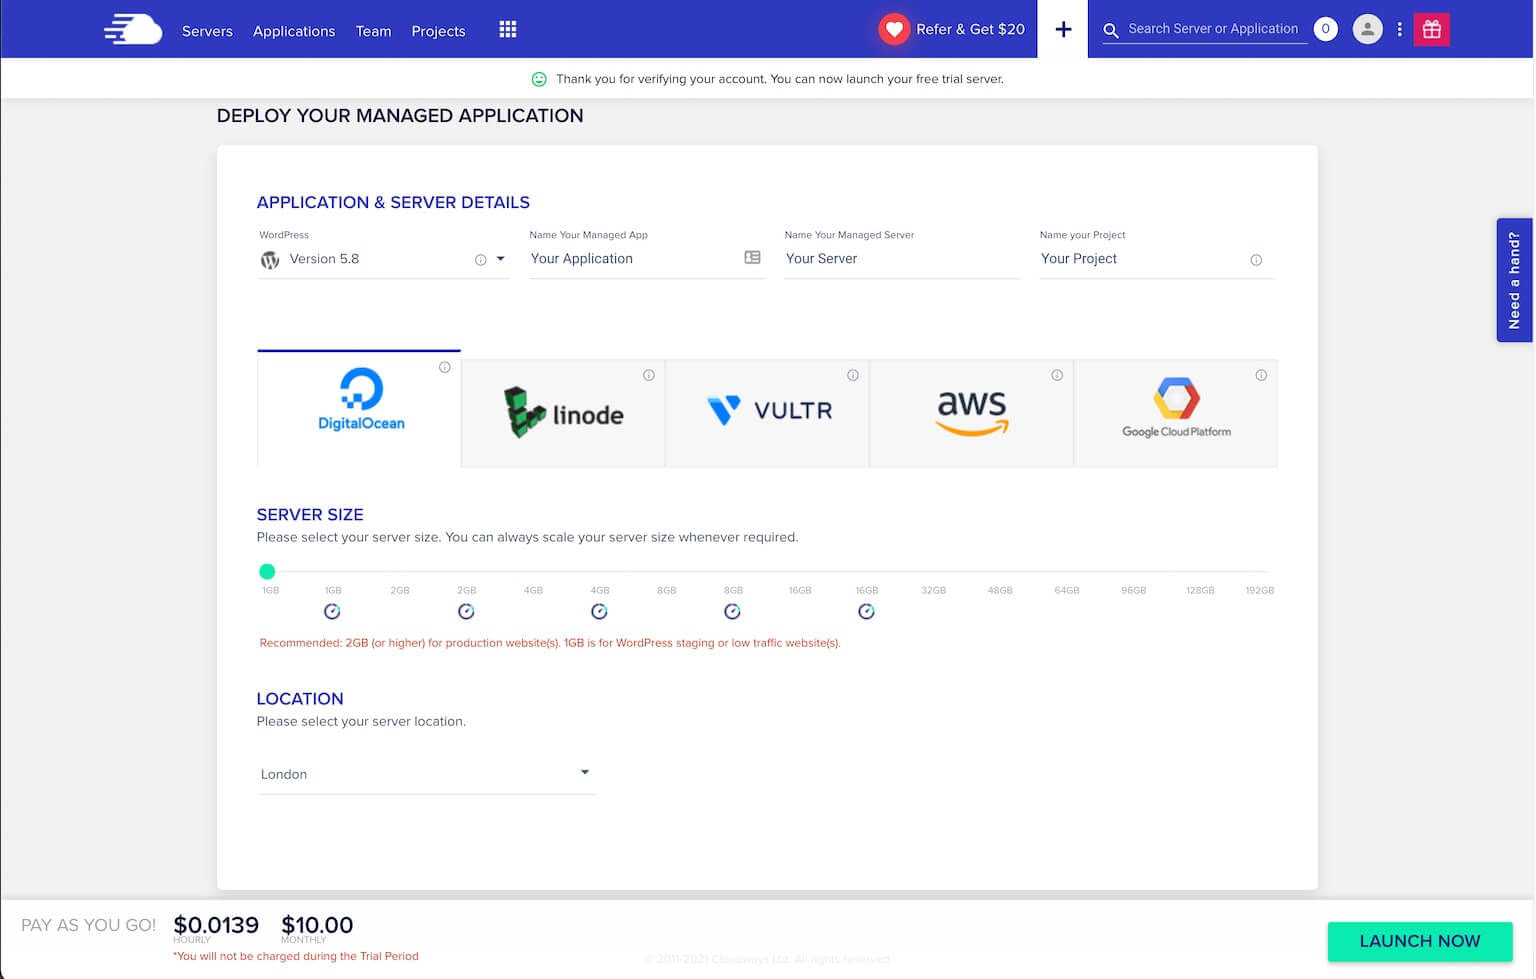
For our example, we’ll choose DigitalOcean and a server size of 1GB. Finally choose the location nearest you and click Launch Now.
**Note the estimated price at the bottom as you shift through the options.
And as you wait for your server to spin up, let’s talk about those who want to transfer a site.
Transferring your site?
You have two options here.
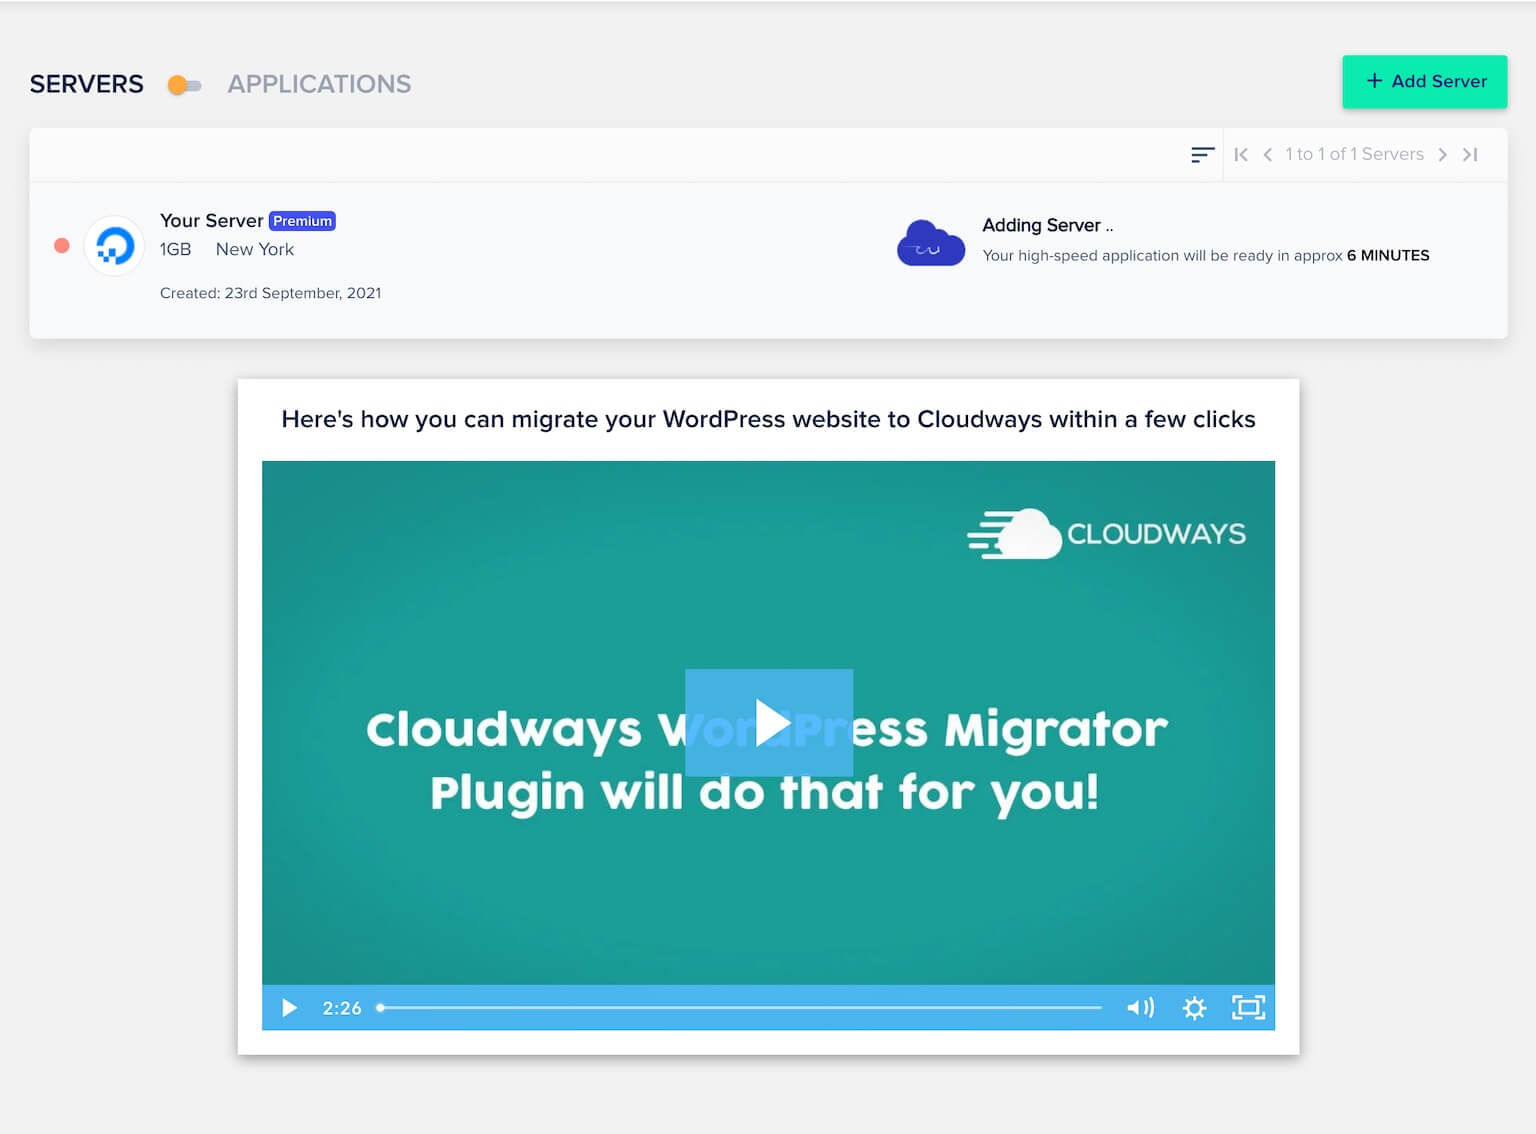
- While you are waiting for your site to spin up, there is a video on the screen (see screenshot above) that walks you through how you easily transfer your existing site to Cloudways using the free WordPress Migrator plugin. Here’s a step-by-step article if you prefer that.
- Cloudways will actually transfer the site for you if you upgrade from the trial plan to a paid plan. So my advice here is to use the three days trial to create a WP site, look around, and see if you like the environment. If so, upgrade to a paid plan after the trial period is over and have them then transfer your site over.
Server Management
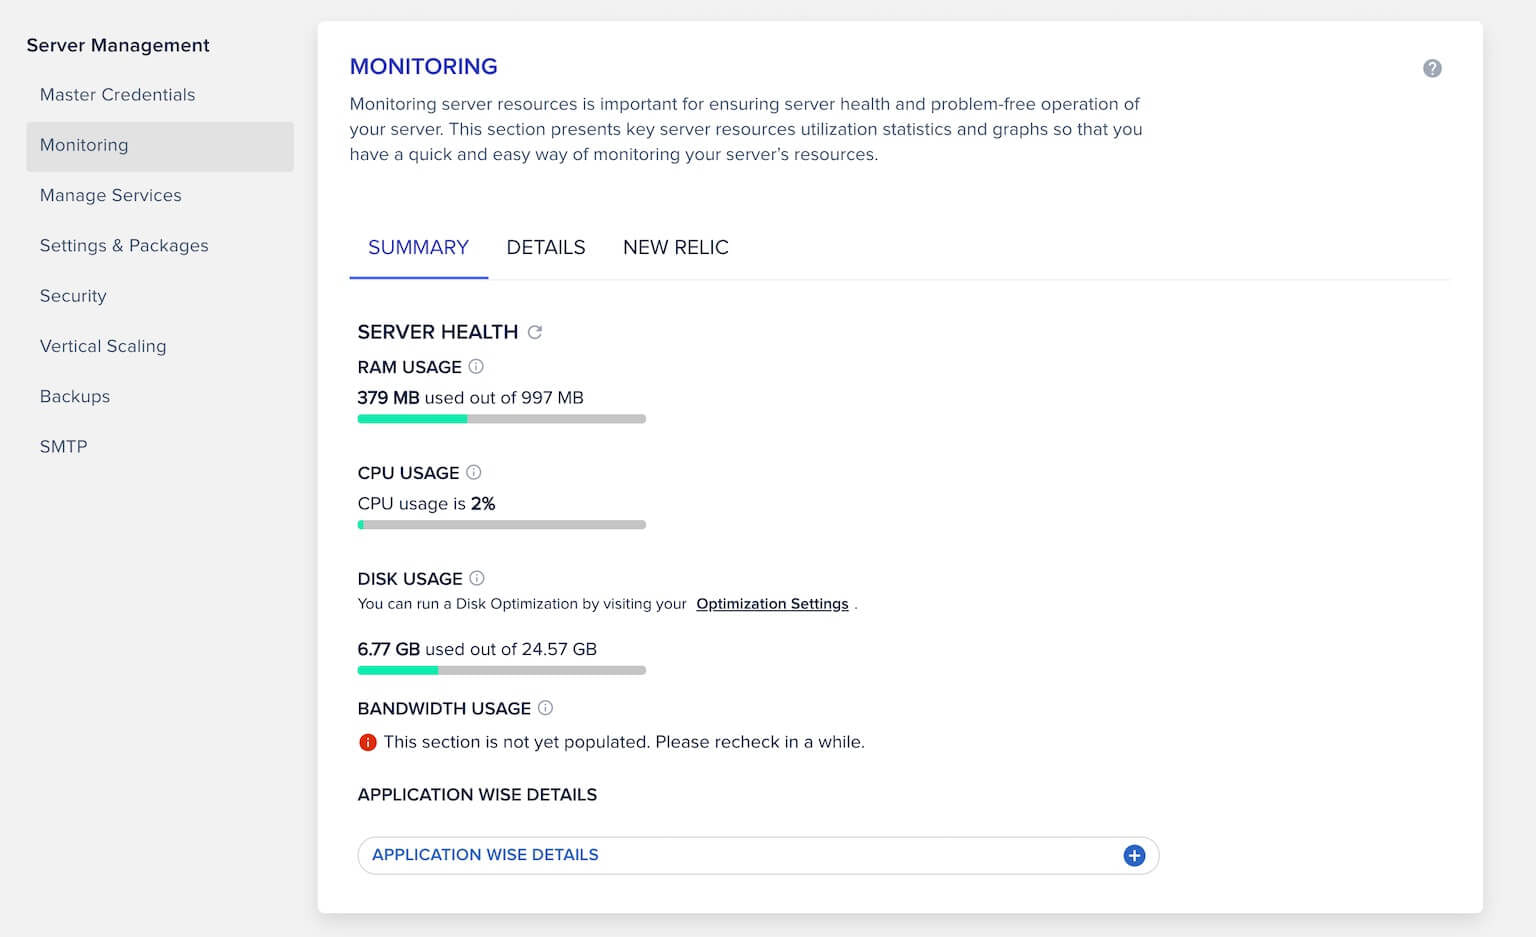
Click on your Server and you’ll come to a Server Management screen. Here you have a whole host of options for managing your server.
Here you’ll be able to:
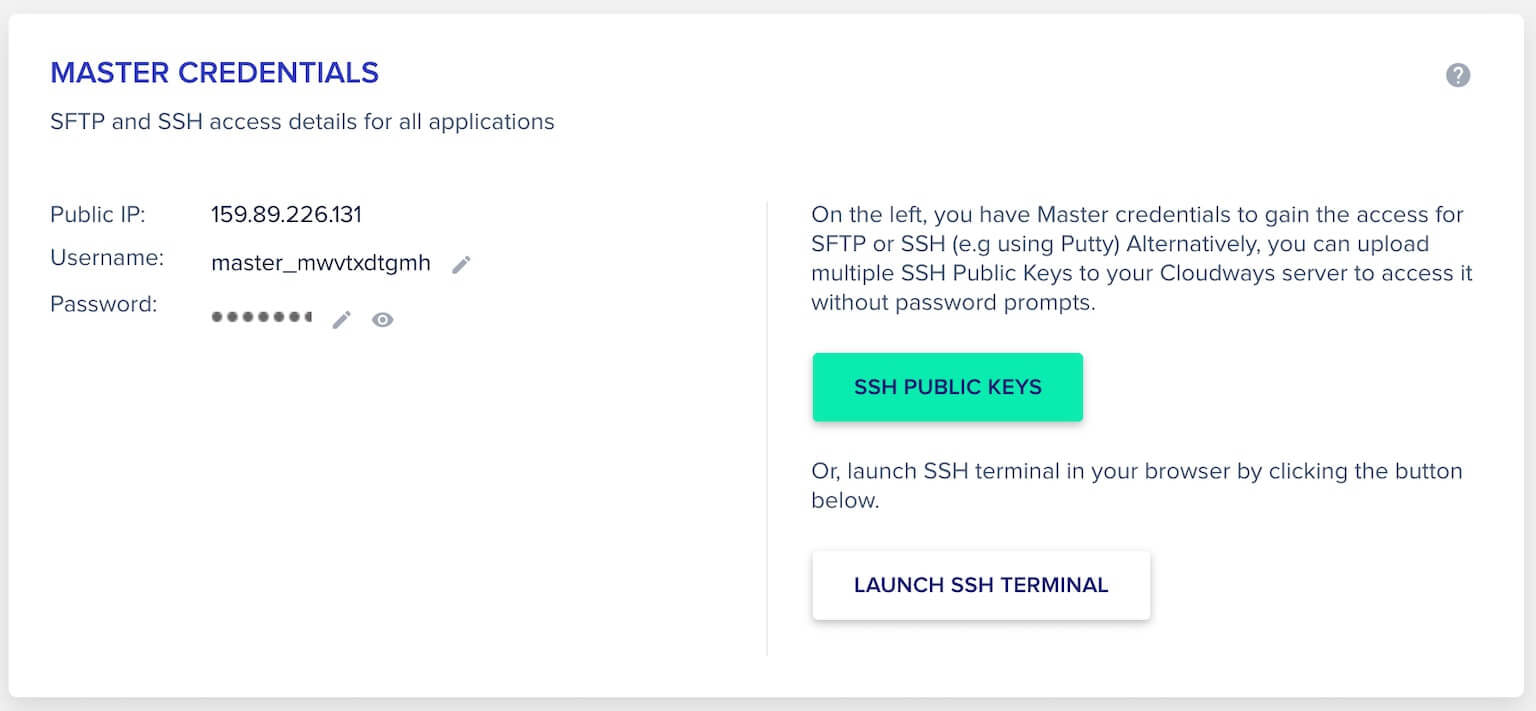
- Upload your public key for SSH access
- Monitor your server stats with nice graphs
- Manage individual services like Apache, MySQL, Memcached, etc by enabling/disabling and rebooting.
- Manage server settings and packages
- Scale vertically (server size and block storage) with the click of a button
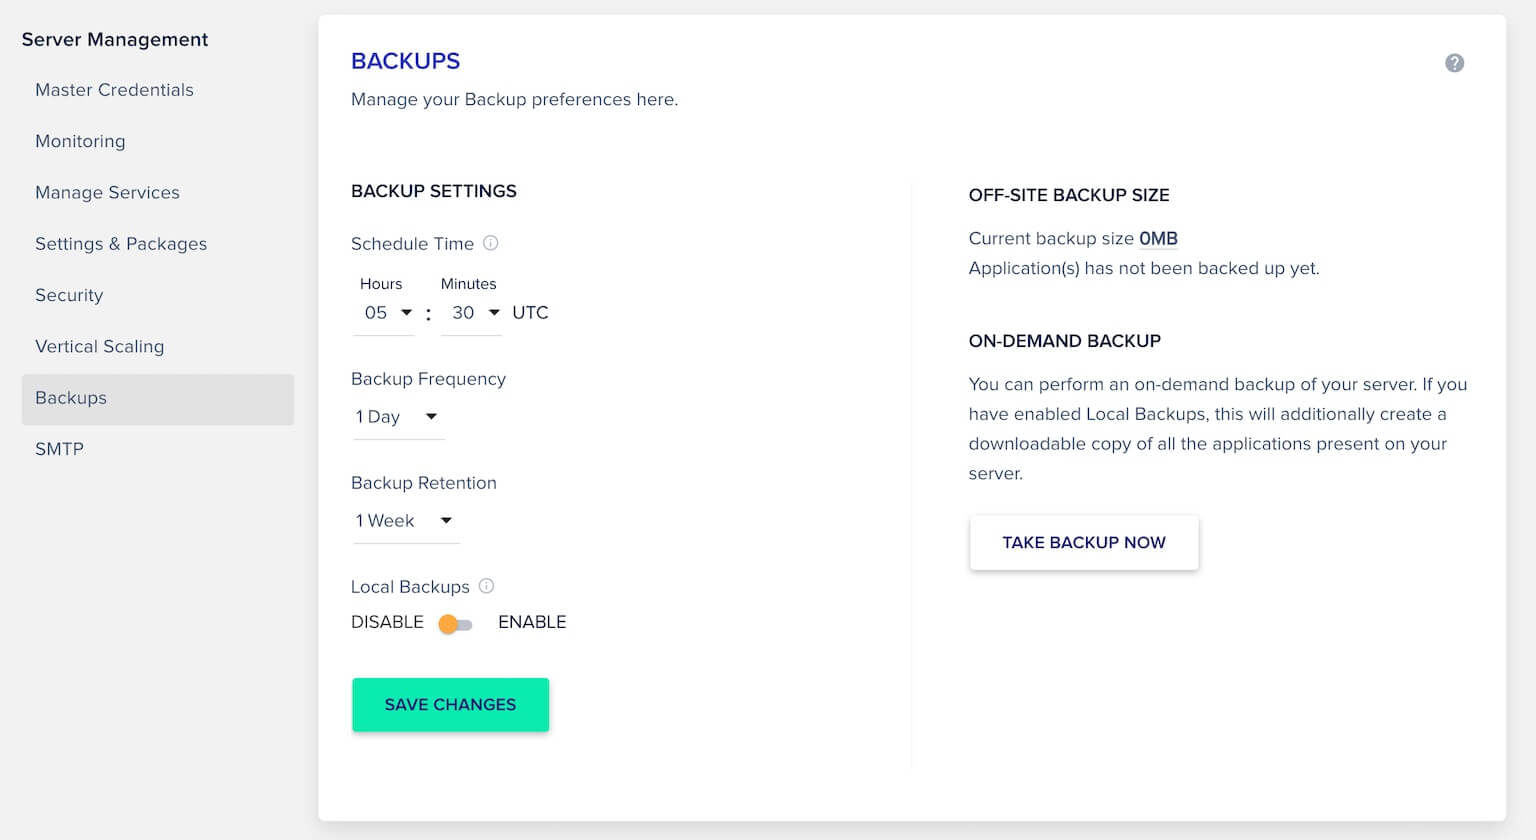
- Set backup intervals (including local)
- Configure SMTP services to send email
I wouldn’t suggest touching any of these up front.
The monitoring is helpful and will let you know if you need to consider vertical scaling in the future.
I would set Backups to run once a day and retain a week’s worth.
If you’re a developer and want to use SSH, go ahead and upload your public key and also change the password as its rather short. You can also use the Local Terminal built in. I tested this and yes it has vi and nano 👍👍.
Application Management
Now let’s shift over to managing our Application. To switch from Servers to Applications, just click on Application in the menu at the top.
Now you can manage all things to do with your Application, which in our case is our WordPress site.
Here you’ll be able to manage:
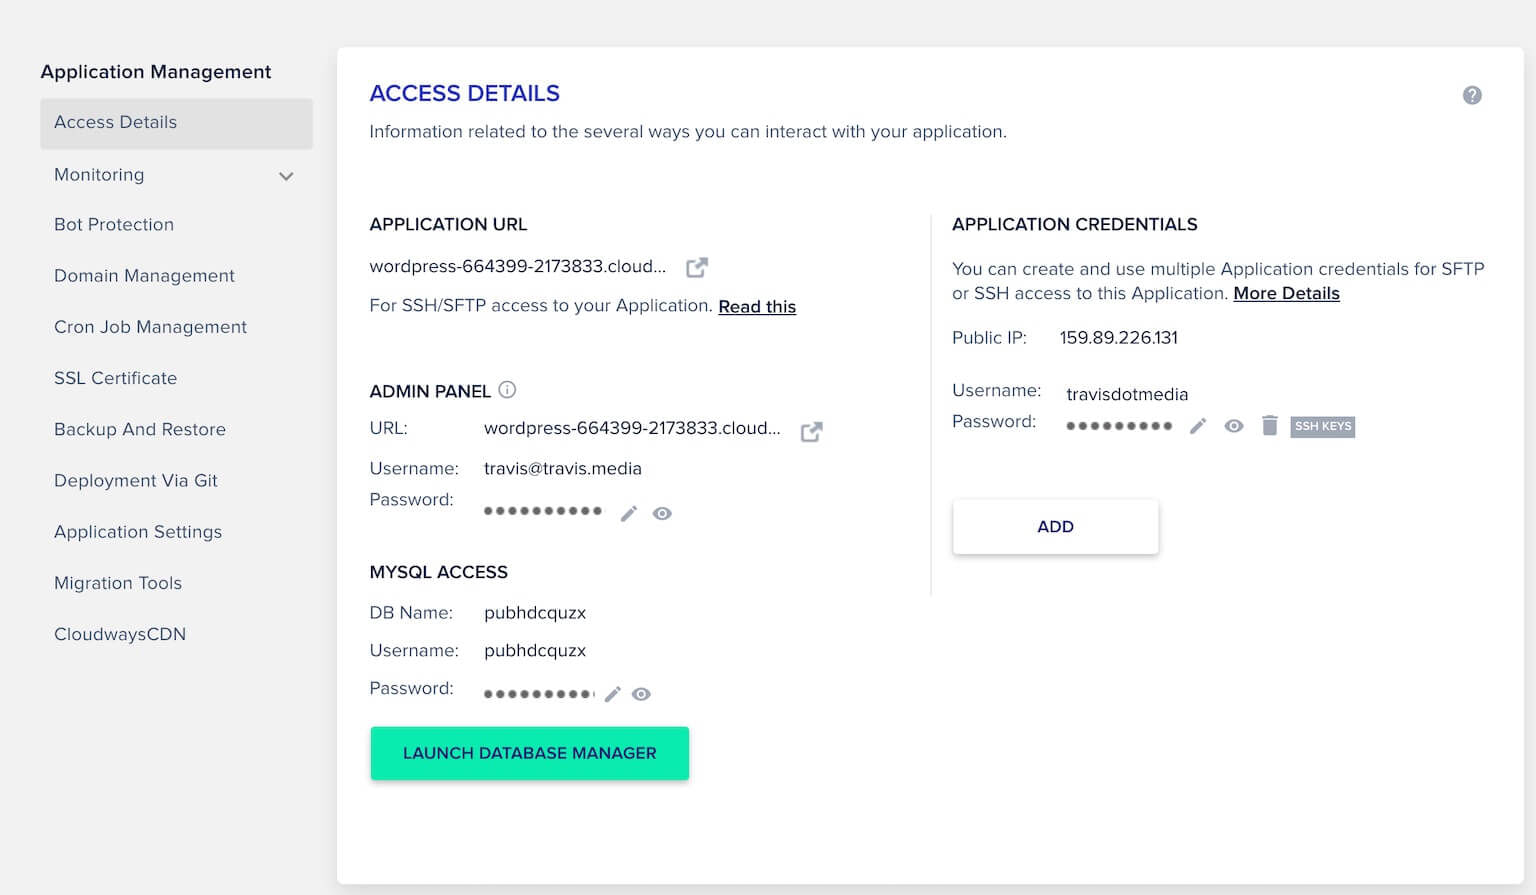
- Access Details including URL to your WordPress site, WordPress credentials, MySQL credentials, and SSH/SFTP credentials.
- Analytics and Log (Access and Error) monitoring.
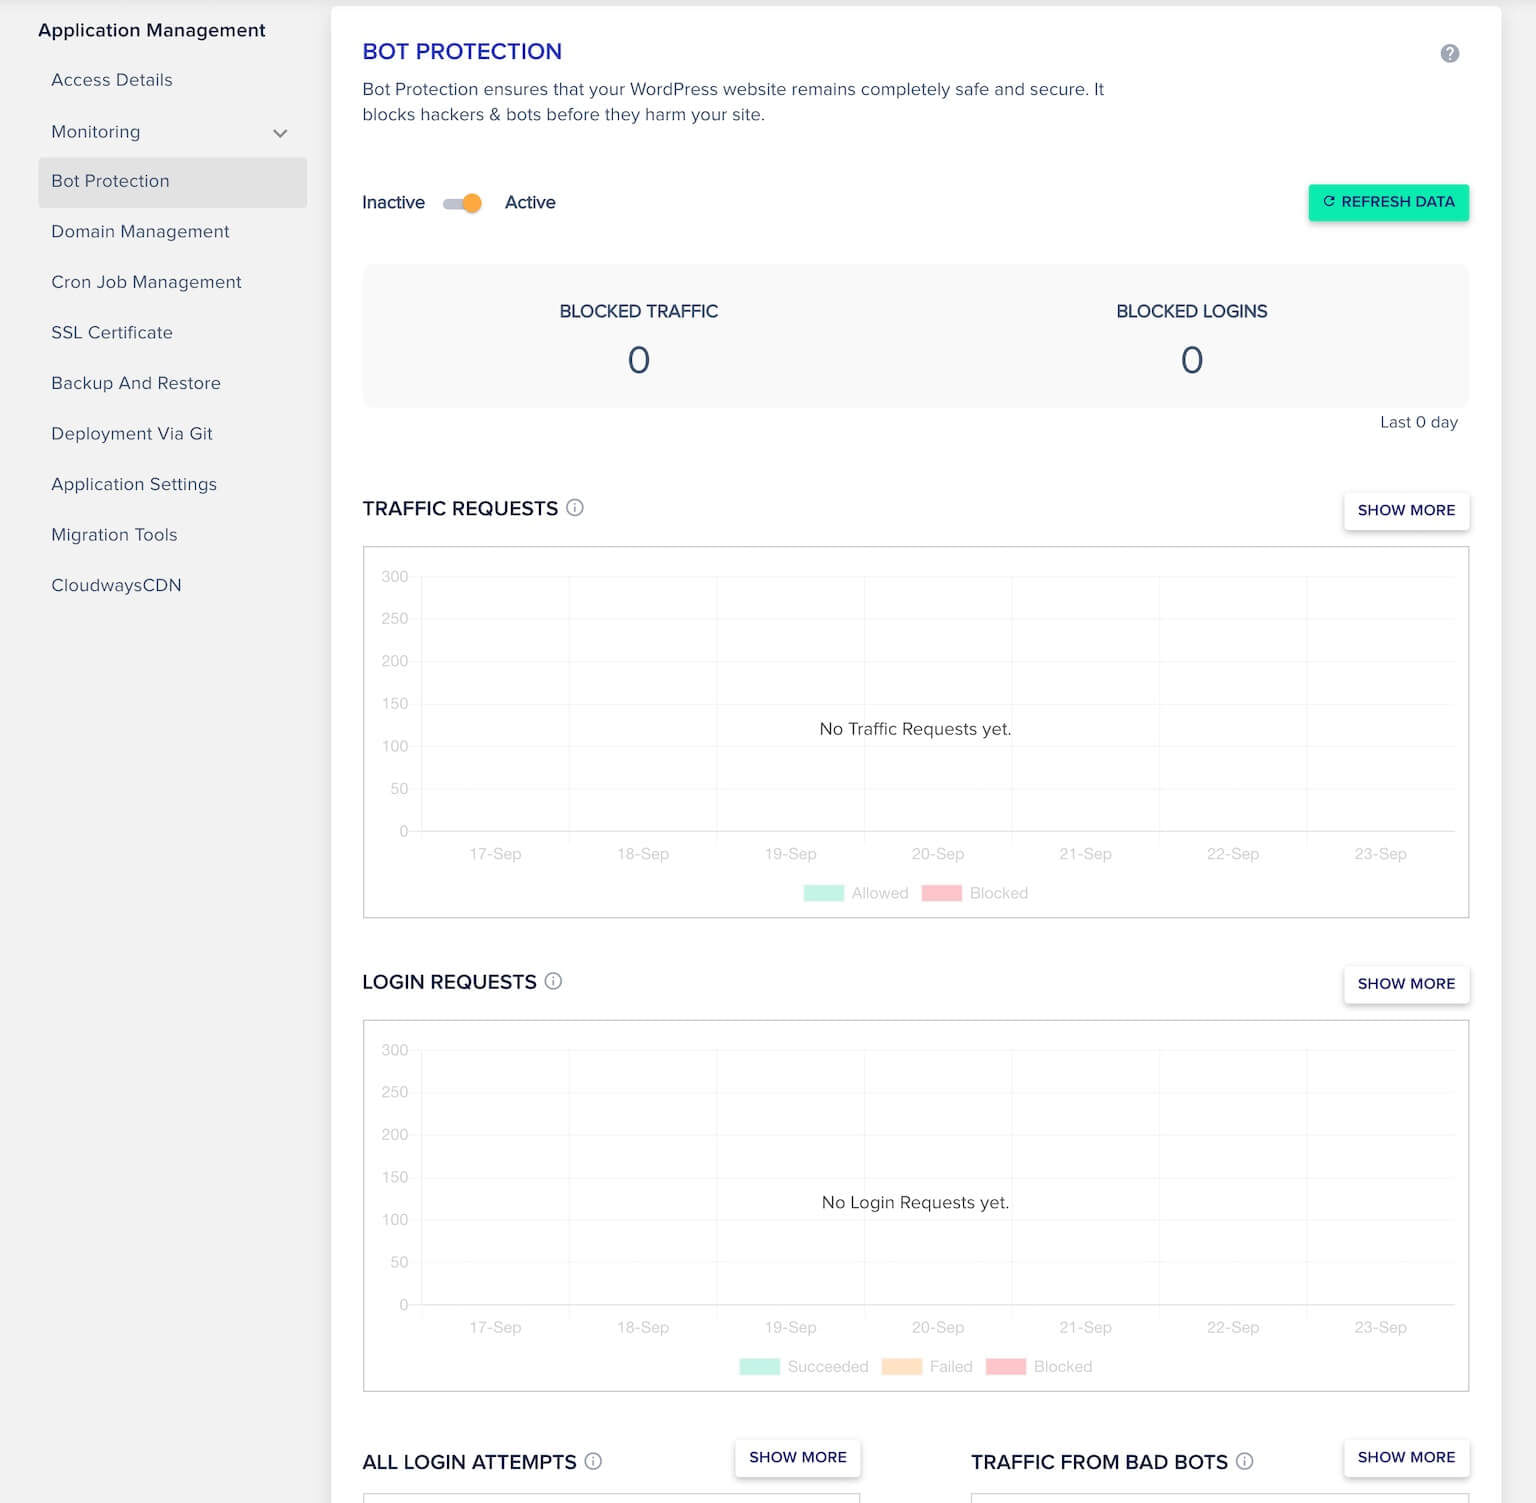
- Bot Protection
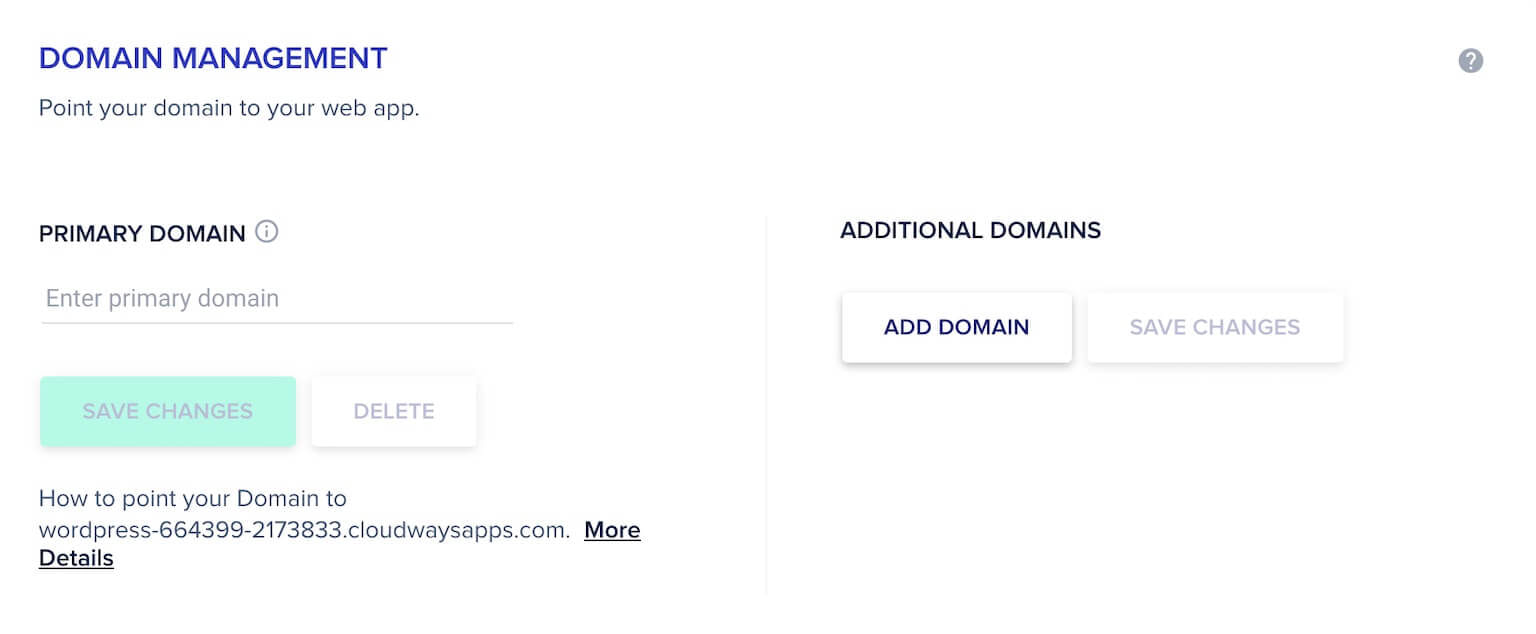
- Domain management
- Cron Job management
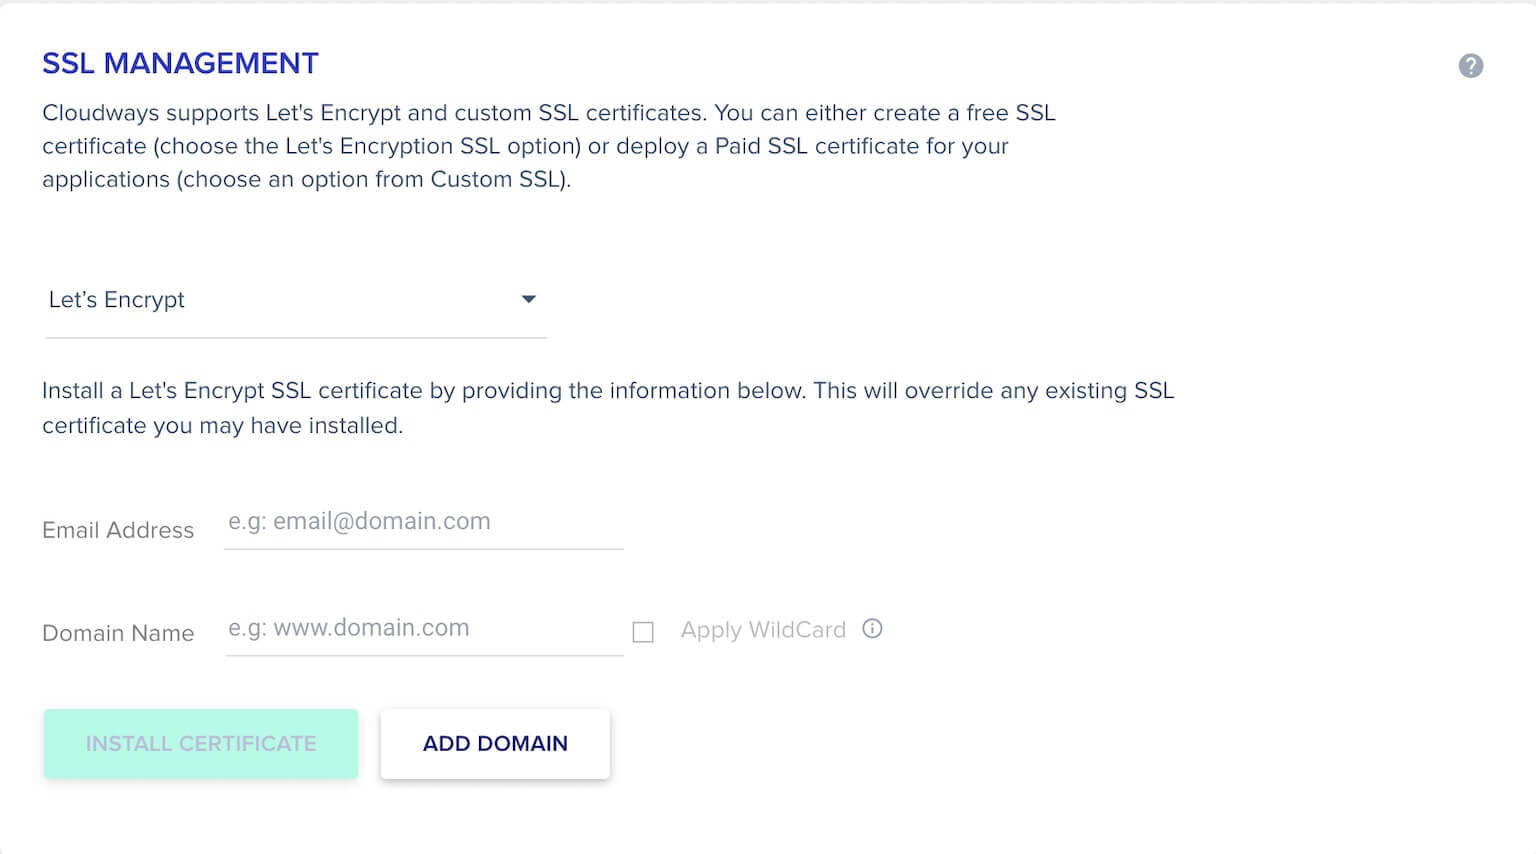
- SSL Certificate
- Backup and Restore
- Deployment via Git
- Application Settings (HTTPS redirection, SSH access, file/folder permissions, etc.)
- Migration Tools
- Cloudways CDN
First I would change my passwords in Access Details as they are just too short for my liking:
Turn on Bot Protection:
When it comes time to migrate your site (and if you are doing it yourself), set your domain, point your DNS to the URL they provide, and install a Let’s Encrypt SSL certificate:
Check Your WordPress Site
Now regardless if you are setting up the site yourself OR you are just poking around to see if you like it before you get Cloudways to do it for you, you can access your WordPress site by clicking on the URL under Access Details. And that will bring you to your current site:
There you’ll see the default WordPress Twenty Twenty-One theme with some Cloudways customizations.
The Benefits of Cloudways?
- Speed: Dedicated environments, PHP7, CDN, SSD, multiple caches by default
- Scalability: Vertical scaling at a a click of a button, auto-healing servers
- It’s managed: As iterated many times in the article
- Security: Dedicated firewalls, free SSL, regular patching, bot protection, 2FA
- Monitoring: Real time monitoring
And many more mentioned here.
Go Sign Up (Free Migration)
If you like Cloudways after three days, then be sure to upgrade and have them migrate your site over (or do it yourself by way of the Migrator plugin as mentioned above.)
Hosting with Digital Ocean’s platform starts at $10/month with Linode at $12/month. Sure going over to Digital Ocean without Cloudways is a little cheaper, but who’s going to manage your server? Not Digital Ocean.
So if you are looking at managed WordPress hosting or looking to upgrade your service, head over to Cloudways and try it out for three days, free of charge.
I think you’ll like what you see.
This page may contain affiliate links. Please see my affiliate disclaimer for more info.