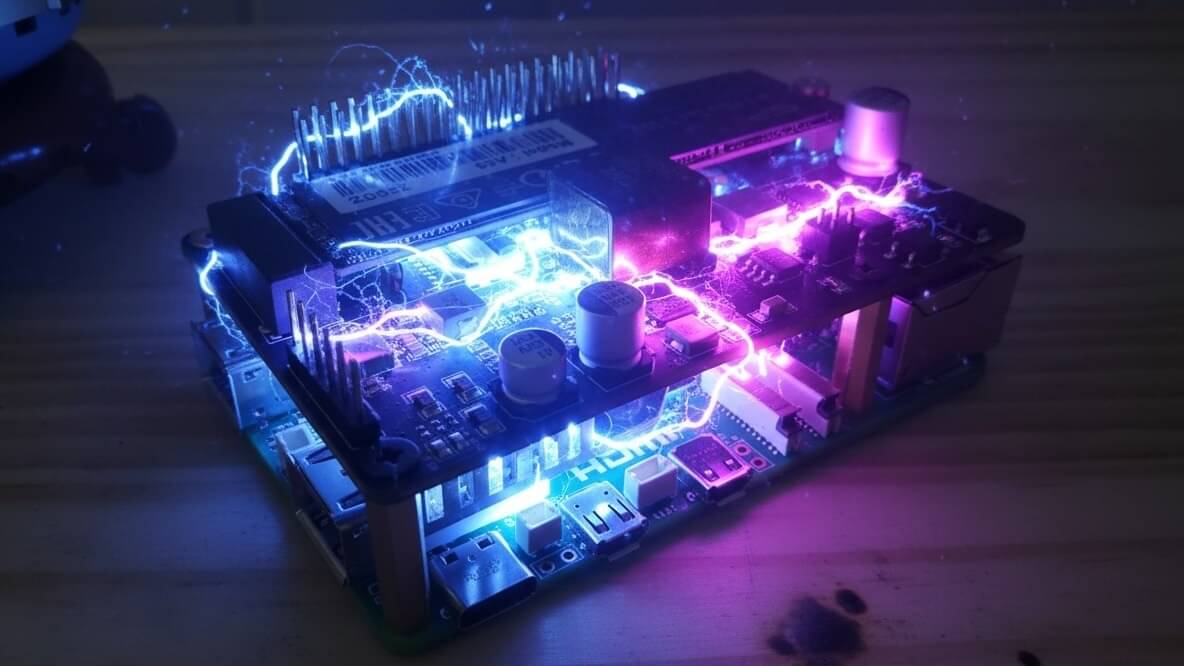
If you’re planning to buy your first Raspberry Pi in 2026, you might feel overwhelmed by all the models and accessories. From the tiny Raspberry Pi Zero ($15) to the classic Pi 3 ($35), all the way up to the powerful Raspberry Pi 5, there are plenty of choices.
But here’s the truth: if you’re buying a Raspberry Pi today, get the Raspberry Pi 5.
It’s the fastest, most capable Pi by a wide margin, and the older boards don’t save you enough money to justify their weaker hardware.
One thing to know up front: memory prices spiked hard as AI data centers gobbled up fab capacity, and Raspberry Pi raised prices three times between December 2025 and April 2026 to cover it. The higher-RAM models now cost well above their launch prices. Raspberry Pi says the increases are temporary and will unwind once the memory market settles, but for now, buy with that reality in mind.
Let’s break down why and how you can set it up for your own projects.

Why Choose the Raspberry Pi 5?
The Raspberry Pi 5 comes with the latest hardware upgrades, making it ideal for everything from tinkering with Linux to running a full home server.
Here are the official prices as of July 2026, depending on the amount of RAM you need:
- 1GB – $45
- 2GB – $65
- 4GB – $110
- 8GB – $175
- 16GB – $305
The 1GB model keeps the entry price low, and for most beginners the 4GB model is the sweet spot. The 8GB and 16GB prices sting, and that’s entirely the memory market, not Raspberry Pi padding margins. Only pay for the RAM you’ll actually use.
I personally run a 16GB Raspberry Pi 5 (alongside an older 8GB model) in a small Kubernetes cluster, and it hasn’t skipped a beat. If you want to try this yourself, check out my guide on installing Kubernetes on Raspberry Pi 5.
Even if you don’t want to mess with clusters, the Pi 5 is a rock-solid option for home labs, servers, and learning Linux.
Two Ways to Get Started: Kit vs. Custom Build
When buying your first Raspberry Pi 5, you generally have two paths:
- The Starter Kit – everything you need out of the box.
- The Custom Build – a more powerful, flexible setup.
Let’s look at both.
Option 1: The Raspberry Pi 5 Starter Kit
This is the simplest way to start. A typical Raspberry Pi 5 starter kit includes:
- The Pi 5 board
- Case
- Power supply
- MicroSD card
- Fan and heat sink
You can find these kits on Amazon (from CanaKit) or directly from CanaKit, which is one of the most trusted Raspberry Pi kit providers. Just compare prices based on the RAM size you want.
👉 I started with the 8GB starter kit when they first came out and later upgraded to a custom build.
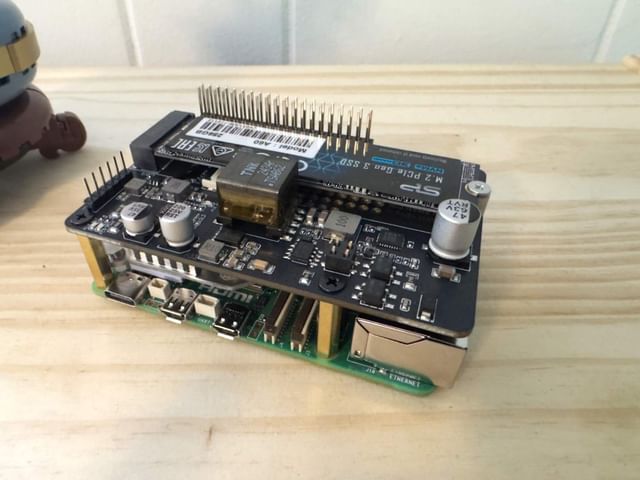
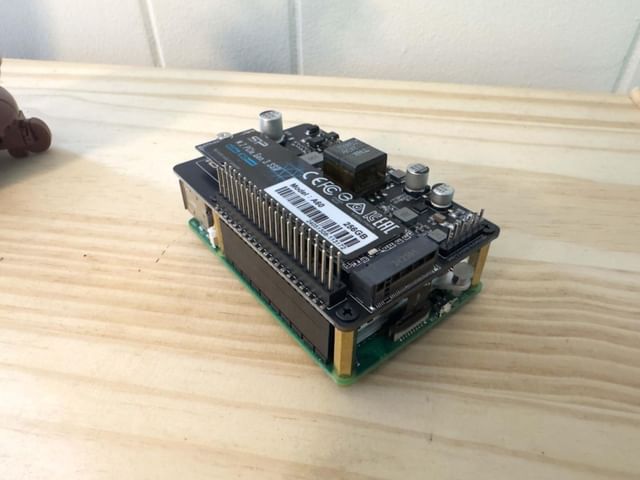
Option 2: A Custom Raspberry Pi 5 Build (More Power)
If you want better performance and more control, here’s my recommended setup:
- Raspberry Pi 5 board – Choose your RAM size.
- PoE Hat with NVMe SSD support – This is the secret sauce:
- Powers your Pi directly from Ethernet (no power cable needed).
- Lets you attach a fast PCIe SSD instead of relying on a slow SD card.
- Case – I didn’t see this when I bought mine, but it comes with the PoE hat and NVMe SSD support built in.
- PCIe SSD – I use a 256GB NVMe drive.
- USB-C SSD connector – Needed for flashing your OS to the SSD.
This setup gives you a faster, more reliable home server experience.
And it looks like this:
Other Options (Cheaper or More Powerful)
Now you don’t have to go this route at all.
You can get a POE hat without an SSD and just use the SD card. You can buy 3 and get a full rack mount for it as demonstrated here.
Or you can actually get more bang for your buck by skipping the Raspberry Pi completely and going for something like this GMKtec Mini with 8GB RAM, a 256GB SSD, a case already built in, and Windows preloaded (which you can wipe and replace with Linux 😉). With Pi prices where they are right now, a mini PC is often the stronger value play, especially against the 8GB and 16GB Pi models.
The important point here is that you have flexibility and it’s fun to piece these things together and build something you understand and can learn from.
How to Set Up Your Raspberry Pi 5
Once you have your Pi, you’ll need to install an operating system. Here’s the step-by-step:
1. Connect Your Storage
- If using a microSD card, insert it into a card reader for your computer.
- If using an NVMe SSD, connect it with a USB-C SSD adapter that I mentioned above.
2. Use Raspberry Pi Imager
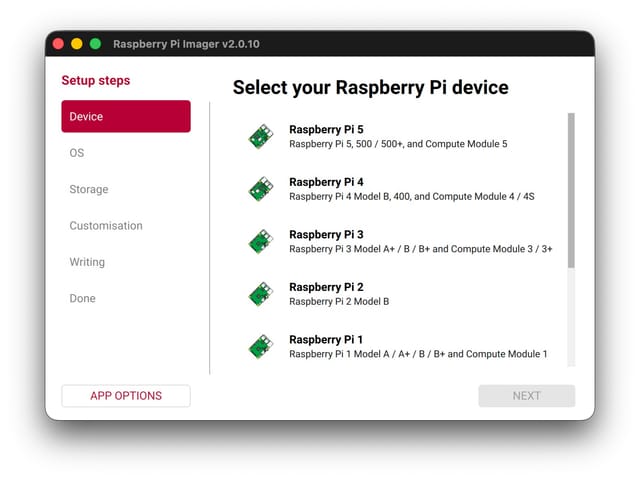
Download the Raspberry Pi Imager and follow the prompts. Imager 2.0 is a guided wizard that walks you through one screen at a time: device, OS, storage, customization, then writing.
Choose Device → Select Raspberry Pi 5.
Choose Operating System →
Here you will choose the operating system you wish to install. The most common installation is going to be Raspberry Pi OS (64-bit), the official Debian-based Linux desktop.
I personally prefer Ubuntu. If this is your preference as well, look under Other general-purpose OS > Ubuntu and choose the latest Ubuntu Desktop LTS.
If you prefer no desktop, then choose the Server option.
There is a desktop-less option for Raspberry Pi OS as well.
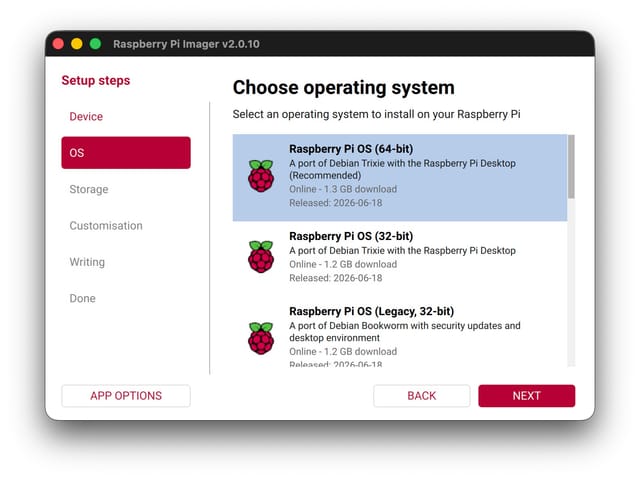
- Choose Storage → Select your microSD card or SSD.
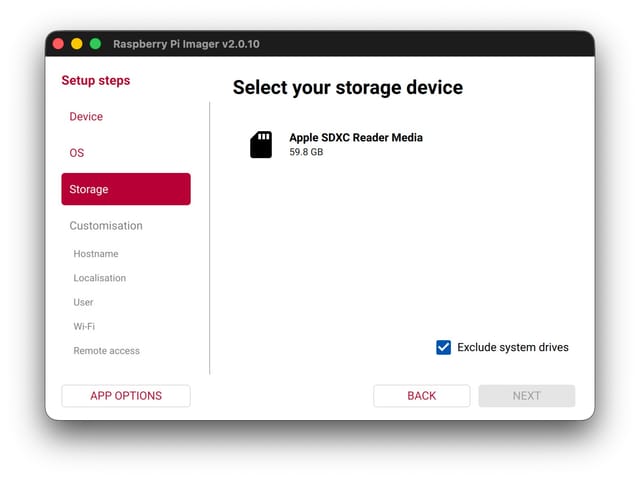
3. Customize Your OS (Highly Recommended)
The wizard includes a settings step right before writing. Use it to set up:
- Your hostname (e.g.,
pi) - A username and password
- Configure your local wireless
- Set your locale
- Add your public SSH key
4. Boot Your Raspberry Pi
Plug in your Pi, connect keyboard/mouse/monitor (if you want a desktop), or just SSH in headless, and you’re ready to explore!
Final Thoughts: Why a Raspberry Pi Is Worth It
Buying your first Raspberry Pi is less about the hardware and more about the possibilities:
- Run your own home server
- Learn Linux and Docker
- Host a media server (Plex, Jellyfin)
- Experiment with Kubernetes (step-by-step Kubernetes on Raspberry Pi 5)
- Build IoT projects
Whether you start with a beginner-friendly Pi 5 starter kit or upgrade to a custom PoE+SSD powerhouse, you’ll have a fun, affordable, and educational new tool to explore.
Frequently Asked Questions About the Raspberry Pi 5
Is the Raspberry Pi 5 good for beginners?
Yes. The Raspberry Pi 5 is beginner-friendly and has the most up-to-date hardware. It’s easy to get started with a starter kit, and the community support is huge.
Do I need an SSD, or is a microSD card enough?
A microSD card works fine for most projects. However, if you plan to use your Pi as a server or for heavier workloads, an SSD (via NVMe or USB) provides faster speeds and better reliability.
How much RAM do I need in a Raspberry Pi 5?
1GB/2GB is fine for light projects, coding practice, or small IoT setups. 4GB is the best pick for most beginners at current prices. 8GB and 16GB handle multiple services, Kubernetes, or heavier workloads, but memory-driven price increases have made them much more expensive, so only pay for what you will actually use.
Why is the Raspberry Pi 5 so expensive right now?
Demand for AI data center memory squeezed the supply of the LPDDR4 RAM the Pi uses, and Raspberry Pi raised prices three times between December 2025 and April 2026 to cover the higher costs. The company describes the increases as temporary and plans to roll them back once memory prices settle. The 1GB and 2GB models were mostly spared.
Can I run Windows on a Raspberry Pi 5?
Not directly. The Pi 5 is designed for Linux-based systems like Raspberry Pi OS or Ubuntu. Some workarounds exist (like Windows IoT), but they’re limited. Check out the GMKtec Mini that I mentioned above for a server with Windows preinstalled.
What can I build with a Raspberry Pi 5?
You can build a home media server (Plex, Jellyfin), personal cloud such as Nextcloud, retro gaming console, IoT device hub, Kubernetes lab, or lightweight web server.
This page may contain affiliate links. Please see my affiliate disclaimer for more info.