There is a lot of “best CLI tools” content out there, and most of it is a catalog someone copied from a GitHub trending page. This is not that. Every tool below is in the Brewfile I use to set up a fresh Mac, which means I actually reach for these every day, not once for a screenshot.
The rule I gave myself: one honest use case per tool. Not the full feature tour, just the specific thing that earns it a permanent spot in my setup. If you install even three or four of these, your day in the terminal gets noticeably faster.
Almost everything here installs with Homebrew, so each entry includes the one-line install command too.
1. fzf: fuzzy-find anything, starting with your history
fzf is a fuzzy finder. You pipe any list into it, start typing, and it narrows the list as you go. That sounds small until you wire it into your shell.
brew install fzfThe single feature I would not give up is fuzzy history search. Add this to your .zshrc:
# Only load fzf's key bindings if fzf is installed
if [[ -t 0 ]] && command -v fzf >/dev/null 2>&1; then
  source <(fzf --zsh)
fi
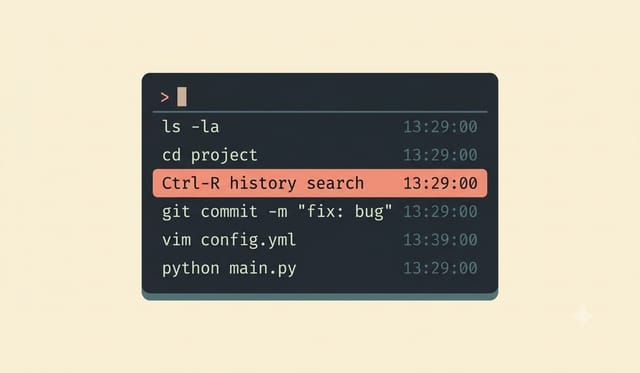
Now Ctrl-R is a fuzzy search over your entire command history. Type a few letters from any command you have ever run, even out of order, and it surfaces it. Ctrl-T does the same for files under the current directory, and Alt-C fuzzy-jumps you into a subdirectory. The --zsh flag that generates this integration is only in recent fzf versions, so if Ctrl-R does not light up, update first.
The other thing to know: fzf works on any list. Piping something into it is a habit worth building.
# Check out a git branch without typing its name
git branch | fzf | xargs git checkout

# Kill a process by fuzzy-searching the list
kill -9 $(ps -ef | fzf | awk '{print $2}')
2. fd: a find you will actually remember
The built-in find command works, but the syntax is punishing. fd is a friendlier, faster replacement.
brew install fdCompare finding every Markdown file in a project:
# find
find . -name "*.md" -type f

# fd
fd -e md
By default fd respects your .gitignore, ignores hidden files, and runs in parallel, so it is fast even on big trees. When you do want the hidden or ignored stuff, fd -H adds hidden files and fd -I includes ignored ones. The mental model is simple: type the pattern, get sensible results.
3. ripgrep: search file contents at a speed that feels illegal
If fd finds files by name, ripgrep (the command is rg) finds them by content. It is a grep replacement that recursively searches directories and, like fd, skips anything in your .gitignore by default.
brew install ripgrep# Find every place you call a function
rg "getUserById"
# Only search Python files, show matching file names
rg -t py -l "import requests"Here is an interesting fact: rg is fast enough and correct enough that it is the search engine inside a lot of the AI coding agents people run now. When Claude Code or a similar tool greps your codebase, ripgrep is often what is doing the work under the hood. The tool you use by hand is the same one the machines picked.
4. lazygit: git without memorizing flags
I still use git on the command line for simple things, but the moment an operation gets fiddly, staging individual chunks, an interactive rebase, resolving a conflict, I open lazygit.
brew install lazygitJust run lazygit inside any repo. It gives you a terminal UI where you can stage individual lines with a keypress, write a commit, browse your branches and their history, cherry-pick, and stash, all without remembering the exact flag order. Interactive rebase in particular goes from a stressful git rebase -i session to just moving up and down a list and pressing a key. It is the fastest way I know to teach someone git visually while keeping them in the terminal.
I do not always reach for it, though. Some days I use the built-in Git panel in Sidekick, my agentic terminal, when I want the git view sitting right next to my agents. But when I am already deep in nvim editing files, it is easy to shift over to lazygit for a second, stage and commit, and drop straight back to the editor without breaking flow.
5. k9s: a live dashboard for Kubernetes
If you touch Kubernetes at all, kubectl is fine but verbose. k9s gives you a live, navigable TUI over your cluster.
brew install k9sRun k9s, then type :pods and hit enter. You get a continuously updating list of every pod. On my homelab cluster that is a wall of pods at a glance, and instead of typing kubectl logs, kubectl describe, and kubectl delete over and over, I just arrow to a pod and press a key: l for logs, d to describe, s for a shell inside it. Type :deploy, :svc, or :ns to jump between resource types. It turns cluster debugging from a wall of copy-pasted commands into moving around a dashboard.
I run a home Kubernetes cluster to learn this stuff hands-on. If you have considered doing the same, here are 7 essential apps that you should deploy first.
6. Starship: a fast prompt that tells you what you need
starship is a shell prompt that shows context, current directory, git branch, git status, language versions, without you writing a pile of shell script to build it.
brew install starshipAdd one line to the end of your .zshrc:
eval "$(starship init zsh)"That is it, you have a good prompt. It is written in Rust and it is fast, which matters because a slow prompt taxes every single command. You configure it in ~/.config/starship.toml, and the nice part is you can turn off the noise you do not care about.
Here’s the config I’m using these days.
7. gh: GitHub without leaving the terminal
gh is the official GitHub CLI. The context switch of stopping, opening a browser, and clicking through GitHub adds up over a day. gh removes most of it.
brew install ghThe commands I run regularly:
# Open a pull request from the current branch
gh pr create

# Check out someone else's PR locally to test it
gh pr checkout 42

# See the PR for the current branch in your browser
gh pr view --web

# Clone without typing the full URL
gh repo clone owner/repo
gh pr create alone is worth it. You push a branch, run one command, answer a couple of prompts, and the PR is up.
8. Stow: manage your dotfiles like a sane person
Once you have configured all these tools, you have a pile of dotfiles you want to keep in a git repo and symlink into place. GNU stow is the classic, boring, correct way to do that.
brew install stowThe idea: keep a dotfiles repo where each tool gets its own folder that mirrors where its config lives in your home directory. Then stow creates all the symlinks for you.
# From inside your dotfiles repo, link the nvim package into $HOME
stow --target="$HOME" nvim
Now ~/.config/nvim/ points back into your repo. Edit the file, commit it, and every machine you stow it onto stays in sync. When you set up a new Mac, you clone the repo, run stow, and your entire environment reassembles itself. No more hunting for where you put that one config a year ago.
9. Age and SOPS: encrypt secrets you can safely commit
The natural next problem after “put my dotfiles in git” is “but some of them have secrets in them.” You do not want API keys and tokens sitting in a repo in plain text. sops plus age solves this cleanly.
brew install age sopsAge is a modern, simple file-encryption tool, and SOPS is an editor wrapper that encrypts the values inside a YAML or JSON file while leaving the keys readable. So you can commit an encrypted secrets file, see its structure in a diff, and nobody can read the actual values without your key.
# Point sops at your age key, then edit an encrypted file in place
export SOPS_AGE_KEY_FILE="$HOME/.config/sops/age/keys.txt"
sops secrets.yaml
That opens the file decrypted in your editor. Save and close, and sops re-encrypts it before it ever hits disk. It is the piece that makes a public-safe dotfiles or infrastructure repo actually safe.
I use it in my GitOps, Kubernetes/Flux deployments.
10. neovim: the editor the whole setup orbits
neovim is my editor, and it is the one tool here that is genuinely a lifelong rabbit hole. But you do not have to go down it to benefit.
brew install neovimSet it as your default editor so git, gh, and sops all use it:
export EDITOR='nvim'
export VISUAL='nvim'
The recent releases made it much friendlier to adopt. As of mid-2026 the stable line is the 0.12 series, which shipped a built-in plugin manager called vim.pack and native insert-mode autocompletion, so you no longer need a third-party plugin manager or a heavy config just to get modern editor features. You can start with a nearly empty config and grow it. Learning enough neovim to edit a file over SSH without reaching for the mouse pays off forever, because it is on every server you will ever touch.
Where to start
You do not need all ten today. If I had to rank them by immediate payoff for a normal developer, I would install fzf, ripgrep, and lazygit first. Those three change how your day feels within an hour. Add starship and gh next, then reach for stow, age, and sops the day you decide to get your dotfiles under control.
The reason these earn their slots is not that they are clever. It is that they remove small frictions you have stopped noticing, and small frictions removed a hundred times a day add up to a real difference. Pick two, install them, and use them for a week. You will not go back.
Terminal Tools FAQ
Do these tools only work on macOS?
No. The install commands here use Homebrew because I am on a Mac, but fzf, fd, ripgrep, lazygit, k9s, starship, gh, stow, age, sops, and neovim are all cross-platform and available through Linux package managers like apt, dnf, and pacman, plus Homebrew on Linux.
Are fd and ripgrep really faster than find and grep?
Yes, noticeably. Both are written in Rust, run in parallel, and skip anything in your .gitignore by default, so on a real project tree they return results much faster while typing less. The speed is real, but the bigger win day to day is the simpler syntax.
Is it safe to commit a secrets file encrypted with sops and age?
Yes, that is the entire point. sops encrypts only the values in a YAML or JSON file, so the encrypted file is safe to keep in a git repo. Without your age private key, the values cannot be read. Just make sure your key file itself is never committed.
Should I use lazygit instead of the git command line?
Use both. Plain git is fine for quick add, commit, and push. lazygit shines for anything fiddly like staging individual lines, interactive rebase, or resolving conflicts, where a visual interface removes the flag memorization.
This page may contain affiliate links. Please see my affiliate disclaimer for more info.